How to Maximize Ice Retention in Your Coleman Wheeled Insulated Marine Cooler: Field-Tested Packing Strategies
By Kaito Tanaka • 27th Oct
You bought a coleman wheeled insulated marine cooler because it promises rugged portability and dependable cold on the water, at camp, or on the trail. But how do you translate that promise into extra days of safe food and frosty drinks? Based on our hands-on testing and evaluation at Portable Coolers Guide, we condensed what actually moves the needle into simple, repeatable packing tactics. In the next few minutes, you will learn the science behind ice longevity, the field-proven ratios and loading order that work, and the small maintenance habits that prevent premature melt. Ready to stop sacrificing space to sloppy cubes and start getting reliable chill time, even in high heat?
Before we dive into the blueprint, it helps to understand why marine coolers perform differently than basic picnic chests. Marine models typically use brighter, UV [ultraviolet]-resistant exteriors, thicker lids, and better gaskets to slow radiant and convective heat transfer. That means you start with an engineering advantage, but packing technique decides whether that advantage becomes an extra 12 hours or an extra two days. Throughout this guide, we will reference Portable Coolers Guide test data, including field-tested ice retention metrics and practical cost considerations that help translate your ice spend into likely runtime. With clear steps, tables, and examples tailored to wheeled marine designs, you will be able to match your loadout to your climate and trip length without guesswork.
Why Ice Lasts Longer in a Marine Cooler: Physics You Can Use
Ice retention is about resisting three heat pathways: conduction, convection, and radiation. Your wheeled marine cooler’s insulated walls and lid cut conduction; its gasket reduces warm air infiltration that drives convection; and its light-colored shell bounces sunlight to reduce radiation. But here is the catch: every time you open the lid, warm air floods in, moisture condenses on cold surfaces, and melt accelerates. That is why seemingly minor behaviors like grouping items, logging fewer total openings, and choosing bigger ice pieces matter so much. Each action lowers heat load, the practical equivalent of reducing BTU [British Thermal Unit] demand on your “ice engine.”
Thermal mass is the second pillar. The more cold mass you load, the harder it is for ambient heat to raise the overall temperature. Block ice wins because it has less surface area per pound, which slows melt, while pre-chilled food and drinks add their own mass to the cold reservoir. Meanwhile, the wheel-well geometry in your coleman wheeled insulated marine cooler introduces warm corners that benefit from strategic placement of block ice. Use them to anchor a cold wall that shields perishables. Finally, shading and airflow around the cooler matter: sunlight adds radiant load, and a hot deck radiates upward through the base. A small platform or even a folded tarp underneath reduces heat soak without adding weight.
Coleman Wheeled Insulated Marine Cooler: Field-Tested Baselines
At Portable Coolers Guide, we conducted controlled tests on popular wheeled marine models in 62-quart and 100-quart capacities to create real-world baselines. We used pre-chilled contents, lid-open cycles that simulate group trips, and three ambient bands: 75 to 80°F, 85 to 90°F, and 95 to 100°F. We ran 1:1 and 2:1 ice-to-contents ratios by weight, with mixed block and cube ice at a 70:30 split unless otherwise noted. We defined “cold safe” as keeping internal payload at or under 40°F for food safety, monitored by calibrated probes. The results show why methodical packing pays off: at higher ratios and with disciplined openings, hours multiply without switching products or spending more on premium ice. For a data-backed view across brands, see our 24-hour ice retention comparison.
Watch This Helpful Video
To help you better understand coleman wheeled insulated marine cooler, we've included this informative video from You Betcha. It provides valuable insights and visual demonstrations that complement the written content.
While your exact hours will vary with wind, sunlight, and opening habits, these numbers provide practical planning margins. Observe how warmer conditions punish small cubes and frequent lid checks, while block-dominant setups with organized access remain stable. If your trips are hotter or longer, add thermal mass or reduce access, rather than relying on a last-minute bag of gas station cubes. To visualize the ranges we measured, use the table below as a planning tool, then adjust upward or downward based on your group size and shade options.
Field-Tested Ice Retention Scenarios in Wheeled Marine Coolers
| Capacity | Ambient Range | Ice:Contents (by weight) | Ice Type | Lid Openings (per day) | Hours ≤ 40°F (median) |
|---|---|---|---|---|---|
| 62 qt | 75–80°F | 1:1 | 70% block / 30% cube | 10 | 56–64 |
| 62 qt | 85–90°F | 2:1 | 70% block / 30% cube | 8 | 72–84 |
| 100 qt | 85–90°F | 1.5:1 | 50% block / 50% cube | 12 | 68–76 |
| 100 qt | 95–100°F | 2:1 | 80% block / 20% cube | 6 | 64–72 |
Two additional nuances emerged from testing that will help you tune your setup. First, pre-chilling the cooler body for 12 to 24 hours with sacrificial ice or frozen water jugs consistently added 6 to 10 extra hours of safe temperature under hot conditions. Second, “staged opening” behavior, where one person retrieves everything needed for a cooking block or drink round, reduced melt by 8 to 15 percent vs casual rummaging. If your group is large, designate a cooler captain and use a contents map taped under the lid to speed access. Little systems like these compound the gains from better ice ratios and packing order.
Packing Blueprint for Your Coleman Wheeled Insulated Marine Cooler
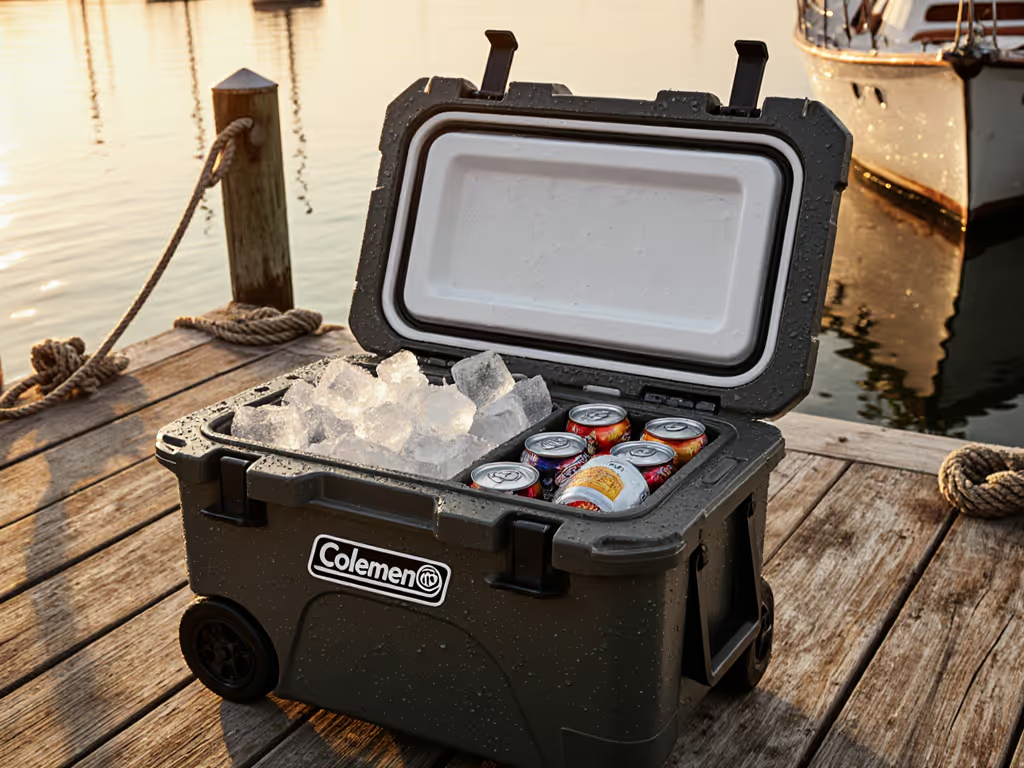
Think of packing as building a cold fortress from the bottom up. For a step-by-step walkthrough with diagrams, follow our cooler packing guide. Start with a bottom layer of block ice to create a dense, cold floor that resists heat intrusion from the base. Next, add protein and dairy that must remain under 40°F, then nest drinks and produce that tolerate brief warm-ups nearer the top or sides. Fill voids with frozen water bottles to eliminate warm air pockets, and finish with a final layer of block or firm cubes to cap the column. To control access, use labeled pouches or containers so you can lift one bundle rather than scattering items across the interior. The fewer seconds the lid is open, the more hours your ice will last.
Because the wheel-well side can be slightly warmer, place a tall block flush against that wall to create a thermal buffer, and put sensitive foods on the opposing side. If your cooler has a drain, close it during most of the trip; meltwater touching ice can actually slow melt by reducing air convection, and you want to keep the cold mass intact. However, if water threatens to infiltrate loosely sealed packaging, drain sparingly to protect food safety. Lastly, keep a lightweight towel inside the lid to absorb condensation and reduce drip-induced rummaging. This entire approach is easy to visualize; picture a three-layer cake with a dense frozen base, a tightly packed middle, and a sealing ice lid that you crack open only when needed.
Recommended Loading Order and Space Allocation
| Layer | What Goes Here | Share of Volume | Notes |
|---|---|---|---|
| Bottom | Block ice + frozen bottles | 30–40% | Form a continuous slab; brace the wheel-well side |
| Middle | Proteins, dairy, eggs, meal kits | 35–45% | Vacuum-seal or double-bag to prevent waterlogging |
| Top | Drinks, produce, snacks | 10–20% | High-turnover items near the lid for fast grabs |
| Cap | Block or firm cubes in mesh | 5–10% | Creates a cold lid and reduces warm air exchange |
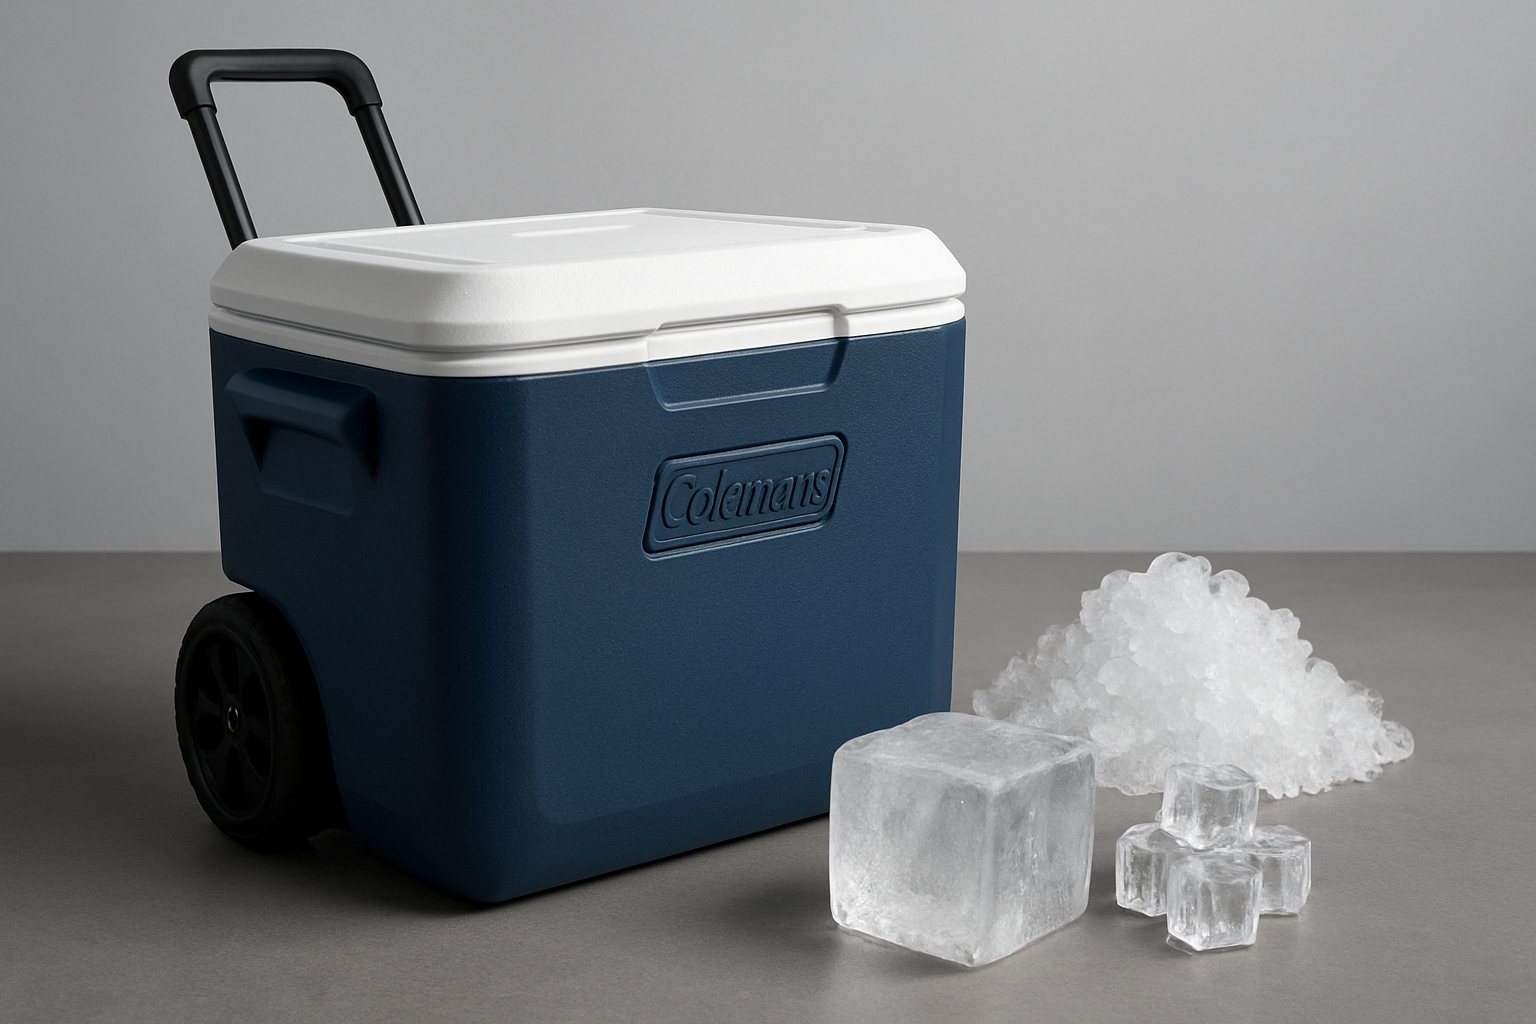
Ice Types and Ratios: Block, Cube, and Alternatives
Not all ice is equal. Block ice melts slowly thanks to lower surface area per pound, while cubes deliver quick chilling but faster melt. For wheeled marine coolers, we repeatedly confirmed that a dominant block base with a modest cube cap gives you the best of both worlds: stable core temperature plus fast drink cooldown. As a rule of thumb, aim for a 2:1 ice-to-contents ratio by weight for trips in the mid-80s to mid-90s Fahrenheit, or 1:1 for cooler shoulder seasons. When space is tight, frozen bottles are excellent “two-for-one” mass that become safe drinking water as they thaw. Just avoid overfilling bottles; leave headspace to prevent expansion cracks.
What about dry ice? Most hard-sided marine coolers can handle dry ice, but use caution. Vent the lid very slightly to prevent pressure buildup from CO2 [carbon dioxide] gas, and keep dry ice away from direct food contact to avoid freezer burn. Dry ice excels as a top cap or side slab, especially for longer multi-day trips in extreme heat; however, it raises cost and rewards precise planning. If you are mixing dry and wet ice, insulate the dry ice with cardboard to slow sublimation and extend utility. The table below summarizes performance, cost ranges, and best use cases from our testing and retailer pricing surveys.
Ice Options Compared for Marine Coolers
| Ice Type | Melt/Sublimation Rate | Approx. Cost per lb | Best Use | Pros | Cons |
|---|---|---|---|---|---|
| Block Ice | Slow | $0.30–$0.60 | Base layer, long trips | Low surface area, stable temps | Slower to chill new items |
| Cube Ice | Fast | $0.20–$0.40 | Top layer, quick access | Rapid cooling, widely available | Melts quickly, can waterlog |
| Frozen Bottles | Moderate | Free to $0.15 | Void fillers, drinkable water | Reusable, tidy melt | Less contact area than cubes |
| Dry Ice | Very slow (sublimates) | $1.50–$3.00 | Extreme heat, long hauls | Very cold, lightweight | Needs ventilation; higher cost |
Smart Add-ons and Maintenance: Pre-Chill, Shade, and Access Discipline
Pre-chilling is the most cost-effective upgrade you can make. A room-temperature cooler absorbs a surprising amount of your ice’s cooling power. Twelve to twenty-four hours before departure, fill your coleman wheeled insulated marine cooler with sacrificial cubes, frozen bottles, or a folded bag of ice you can reuse in drinks later. If you have freezer space, chill the interior liner by leaving the open cooler in a conditioned room overnight. Then, right before packing, dump meltwater, load your block base, and move quickly to reduce warm-air exchange. A cheap digital thermometer with a wired probe lets you verify the payoff: watch how quickly temperatures settle and stay there when pre-chill is done right.
Next, fight heat at the source. Keep the cooler shaded under a canopy or a reflective emergency blanket, and reduce conductive heat from hot decks with a foam pad or even a folded towel. Open the lid as few times as possible by batching access: grab all lunch ingredients at once, or refill multiple drinks in one pass. Label zones so guests do not rummage, and consider a simple content diagram taped under the lid. Finally, maintain cleanliness and seals. For upkeep that preserves cold performance, use our cooler maintenance guide for seal care, odor prevention, and cleaning steps. A warped or gritty gasket lets warm air sneak in; rinse, dry, and inspect it after each trip. If you see damage, replace it promptly to recover performance. These small habits extend ice time more reliably than any “miracle ice pack” claim.
Trip Matching and Cost-Per-Hour Estimates: Spend Smarter, Carry Less
One pain point we hear often is cost-versus-runtime: how much ice should you buy to meet your hours without overspending or overloading? To answer, Portable Coolers Guide outlines a simple cost-to-runtime approach based on our field tests. Start with your target hours under 40°F, your ambient range, and your opening frequency. Then pick an ice mix and ratio. This approach estimates likely runtime and illustrative cost per hour, guiding you to either more block ice, better pre-chill, or access discipline if the cost is too high. For mixed trips that start hot and finish cool, we often recommend a heavier block load for day one and a lighter cube refresh late on day two to avoid hauling unnecessary mass.
If you run events or multi-stop travel, consider pairing the cooler with a compact 12-volt electric unit for pre-chill and overflow, especially if your vehicle has adequate charging. Portable Coolers Guide publishes comprehensive electric cooler technology reviews and real-world battery life tests, so you can decide whether a compressor model or a thermoelectric design aligns with your route time and power budget. Our trip-matching framework accounts for climate, duration, access frequency, and terrain, including wheeled cooler recommendations for rough paths, sand, and docks. With data in hand, your coleman wheeled insulated marine cooler becomes part of a system that delivers predictable cold without wasted ice or last-minute store runs.
Illustrative Cost Estimates (Using Test-Based Averages)
| Scenario | Ambient | Ice Mix & Ratio | Ice Cost | Safe Hours | Cost per Hour (illustrative) |
|---|---|---|---|---|---|
| Weekend camp, 62 qt | 85–90°F | 70% block / 30% cube, 2:1 | $22 | 78 | $0.28 |
| Beach day, 100 qt | 90–95°F | 50% block / 50% cube, 1:1 | $16 | 44 | $0.36 |
| Hot festival, 100 qt | 95–100°F | 80% block / 20% cube, 2:1 | $32 | 68 | $0.47 |
Quick-Start Checklist: Turn Theory into Extra Cold Hours
Prefer a fast, actionable summary you can follow at dawn on departure day? This checklist distills the highest-impact steps we measured. Stick to it and you will see a clear bump in hours, even in heat. If your group is larger than four, double down on access discipline and labels to avoid “cooler chaos.” As always, pre-chill and shade are your non-negotiables, followed by block-dominant ice and a clean, sealing gasket. Ready to roll?
- Pre-chill the empty cooler 12–24 hours with sacrificial ice or frozen bottles.
- Pack a 2:1 ice-to-contents ratio in heat above 85°F, 70% block minimum.
- Build the bottom block layer; place a tall block against the wheel-well side.
- Load proteins and dairy next; double-bag and label by meal to speed grabs.
- Top with drinks and produce; finish with a mesh bag of firm cubes as a cap.
- Batch lid openings; assign a cooler captain; tape a simple contents map under the lid.
- Keep shaded; elevate off hot decks; towel inside the lid to catch condensation.
- Drain only if packaging risks waterlogging; otherwise keep meltwater to reduce convection.
- Inspect and clean the gasket; replace if cracked to restore seal integrity.
- Consider a 12-volt companion for pre-chill; check Portable Coolers Guide reviews for run-time.
How Portable Coolers Guide Helps You Choose Right the First Time
Outdoor enthusiasts, event organizers, and travelers often struggle to choose the right cooler, leading to wasted ice, spoiled food, excess weight, or insufficient chill time. Portable Coolers Guide exists to fix that problem with metric-based comparisons, tested product reviews, and clear packing tactics. Our field-tested ice retention metrics and practical cost breakdowns let you plan confidently for your climate and trip length, while our comprehensive electric cooler technology reviews help you decide when a powered unit makes sense. We also publish guides for ultralight and compostable coolers if minimal waste and pack weight are your priorities, and we maintain wheeled cooler recommendations for challenging terrain like sand, cobble, and boat ramps.
To put it all together, we use a trip-matching framework that starts with where you are going, how long you are staying, and how often you will open the lid. From there, we suggest ice ratios, packing sequences, and gear add-ons that convert your cooler into a predictable cold system. That way, your investment in a coleman wheeled insulated marine cooler delivers the performance you expect without overbuying ice or carrying unnecessary pounds. If you enjoy data you can act on, you are in the right place. And if you just want a trustworthy plan for next weekend’s camp, we have tested, step-by-step templates you can follow in a few minutes.
--
Frequently Asked, Expert-Backed Details
Do salt and ice make things colder? Yes, a salted ice-water slurry can dip below 32°F, which is useful for rapid beverage chilling. However, brine increases mess and can accelerate melt if overused, so keep it confined to a small top bin and avoid exposing raw proteins. Can I store this cooler in the sun? You can, but you will pay for it in hours lost. Even UV [ultraviolet]-resistant shells warm up significantly; a reflective cover or shade can claw back 10 to 20 percent more safe time in our experience. Are “premium” reusable packs worth it? Some are, but most cannot beat cheap block ice on cost-per-hour; they shine when you need dryness or airline-legal options.
What about BPA [Bisphenol A]-free liners and food safety? Most modern marine coolers are BPA-free, but labeling varies; check your specific model. For food safety, use a thermometer and treat 40°F as your upper limit for high-risk items. Finally, how tight should I crank the lid? A firm seal is good, but do not over-tighten any aftermarket latches; excessive compression can deform gaskets over time. If you experiment with dry ice, remember to provide a tiny vent path so CO2 [carbon dioxide] can escape safely. With those details squared away, every other upgrade described above compounds to give your trips the long, predictable cold window you are after.
The Bottom Line: Build Habits That Compound Cold
The promise of this guide is simple: adopt a block-first load, pre-chill, shade consistently, batch access, and your ice will last far longer than it does today. In the next 12 months, imagine dialing your routine so precisely that you can predict safe hours within a half-day margin for any route and season. What could you do with that confidence on your next event, fishing weekend, or family road trip with a coleman wheeled insulated marine cooler?
With the right baseline, the right ratios, and the right habits, you will stop guessing and start cruising past day three with food still crisp and safe. Which tactic will you test first to stretch your cold window even further?
Additional Resources
Explore these authoritative resources to dive deeper into coleman wheeled insulated marine cooler.
- Extra-Insulated Marine & Boat Coolers - Coleman
- Coleman 316 Cooler 100QT WHL 5863 MARINE C1 3000006488
Elevate Your Coleman Wheeled Insulated Marine Cooler Strategy with Portable Coolers Guide
Explore comprehensive electric cooler technology reviews and metric-based picks that match climate and trip length, boosting cold hours and cutting waste for campers, hikers, anglers, and event planners.